
Register & Check In Attendees For Free With Airtable

Name badge creation ruffles every event manager’s feathers, it is probably one of the least enjoyable parts of coordinating an event, it requires a lot of organization, data management, repetitive task-doing and attention to detail. So working with the right tools to streamline this is quite important, so thank you Airtable.
Airtable is a cloud-based spreadsheet/database hybrid that lets you collaborate with other people. It is a powerful organization tool with endless use cases. In this post we propose a way to use Airtable as an event management platform, complete with attendee registration and handling, name badge creation (with the help of Conference Badge) and QR code check-in functionalities!
At the end of this post you will be able to host a professional event with little equipment, you’ll only need a computer and a smartphone.
Getting started
Create an Airtable account.
Open our Name Badge List Template
Click Copy base on the upper right corner.
Select to which workspace you want to add this Base to.
Share the new base with your team, if needed.
Attendee registration
There are two ways to do this. If you already have a few attendees in Excel you can manually type them up in Airtable or better yet import the file.
If you’re starting from scratch (most recommended), you can use the form we created in Airtable and put it up in your website.
If you successfully copied our base to your workspace, you should already have a form up and ready, to access it:
Go to the Name badge Registration Form view

Click on Share form
Click on Embed this form on your site
Copy the Embed Code and paste it into your website.

When an attendee completes their registration and clicks submit, a new row of information will be added to the Airtable file.
Attendee information
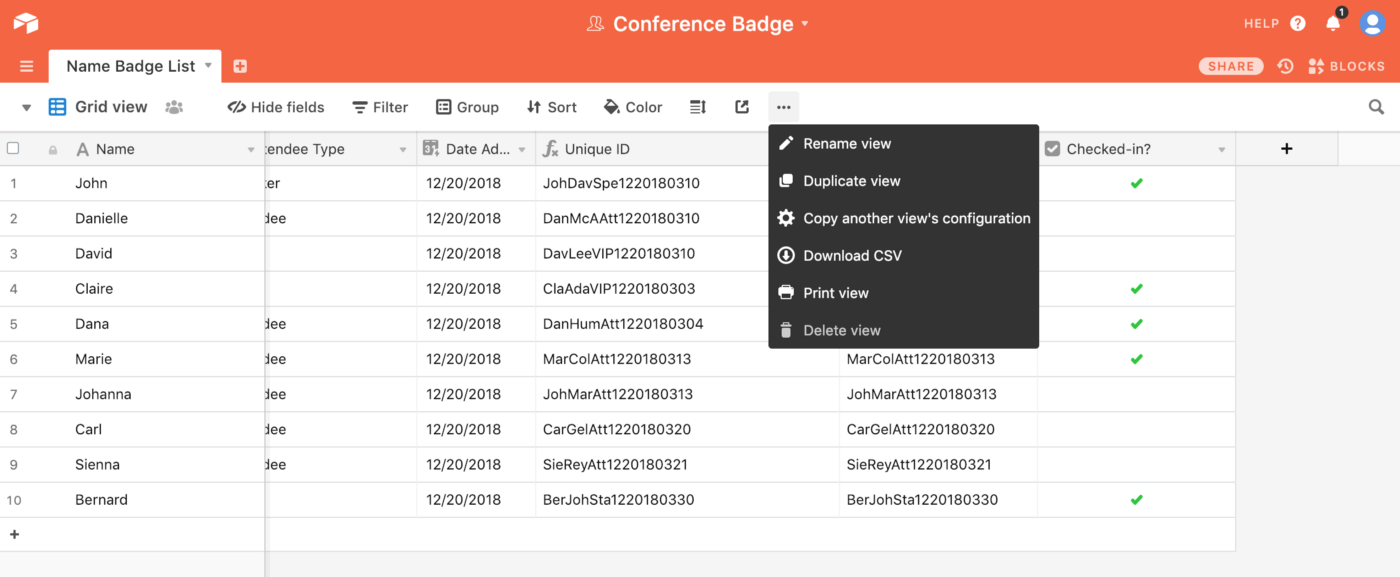
The Airtable base we designed contains the most general information fields you might want to add to your badge design:
Name
Last Name
Company
Attendee type
Email address
In the file you will also see 4 other columns:
Date added*
Unique ID*
Check-in Barcode
Checked-in?
*The information in these fields will be generated automatically.
The unique ID is created by using: The first 3 letters of the (name)+(last name)+(attendee type) and the date added timestamp. The check-in barcode field needs to be copied from the Unique ID column, it’s a very simple copy/paste.
You need to upload the CSV file that was just downloaded from Airtable, also please fill in the other fields and hit continue.

Then match your spreadsheet columns with your attendees info

Almost done! Now select the product and size. You can get PDF badges, these you print at home or at your local print shop, or better yet you can get printed badges, those we print, assemble and ship right to your door, these are great time-savers.

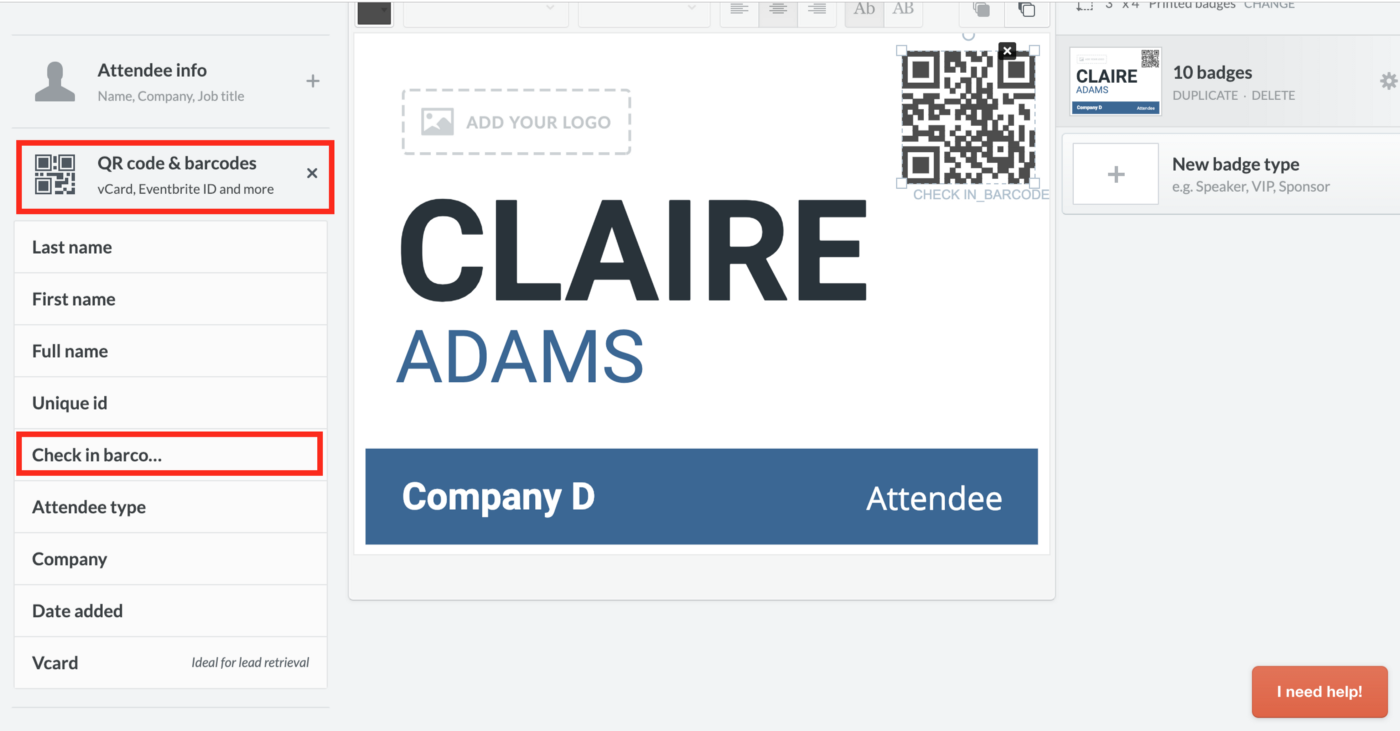
You will then arrive to the theme picker and the badge editor. Here you can add your logo, customize the back, add a background, etc. You can completely customize the badge to fit your event’s branding.
Now, let’s add the QR codes that will let you scan and check-in your attendees! You first click on the left-side menu option that says QR code & barcodes and from the submenu make sure to select Check-in barcode.
Once you are done designing the badges you may start the checkout process and get the badges printed and shipped or download the PDF file.
Check in attendees
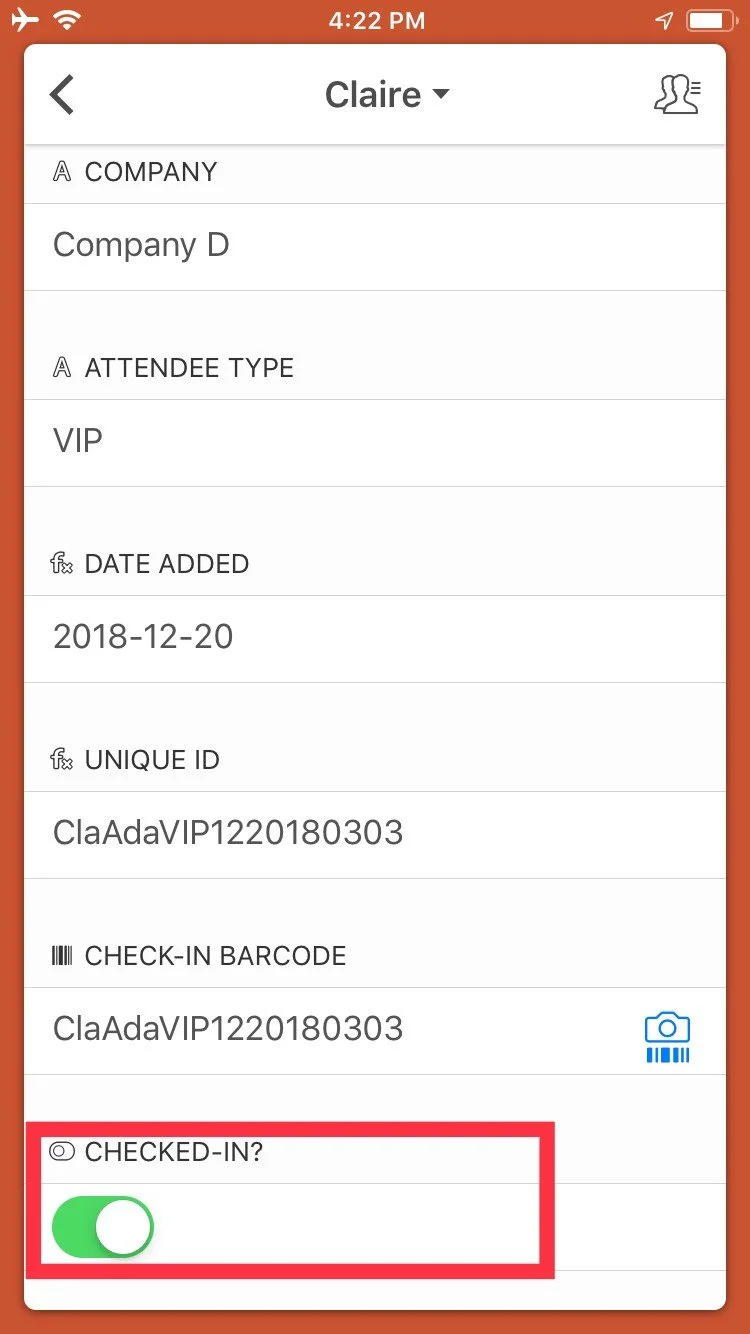
The first thing you need to do is download the Airtable app for iOS or Android. Log in and select the workspace you’re using. Then click on the search icon and then on the little camera with the barcode.

Now that you have scanned the QR code from the badge, the app will automatically find the attendee from the list.
Scroll a little and you will see the Checked-in? option, flip the switch to check-in your attendee.
Bonus
We created one last view for you. It lets you see who has checked-in to your event, live! Here’s how you can access that:
Go to the Checked-in Attendees view

In this gallery view you will only see people who are checked-in. Pretty cool right?
