
How to Print Name Badges from Excel
Quick summary: You can print name badges from Excel by using an Excel spreadsheet as the data source and connecting it to a badge template in Microsoft Word, Avery Design & Print, or dedicated event badge software. Excel stores each attendee’s information, while the template controls the badge dimensions, typography, branding, and print layout. The most reliable workflow is to clean the attendee list, select a template that matches the physical badge stock, complete a mail merge, preview every record, print a test page, and save a merged PDF before producing the full set.
Printing name badges sounds like a small administrative task until an event involves hundreds of attendees, late registration changes, long job titles, sponsor categories, and individualized QR codes. At that point, typing names into individual templates is no longer practical. It creates too many opportunities for spelling errors, inconsistent formatting, duplicated badges, and slow reprints at the registration desk.
An Excel file solves the data problem by creating one reliable attendee list. It does not, by itself, solve the design and production problem. That is where Microsoft Word, Avery Design & Print, or an event badge platform comes in. The spreadsheet supplies the variable data, while the badge template determines how that information appears on each printed credential.
The familiar Microsoft workflow is a mail merge. Word connects to the spreadsheet, reads one row at a time, and replaces fields such as first name, last name, company, and job title with the information belonging to each person. Microsoft specifically recommends using a well-formatted Excel spreadsheet as a mail merge data source and using Word to configure, organize, review, and print labels.
That workflow is useful for straightforward badge sheets and mailing labels. For larger conferences, custom event badges, complicated categories, or frequent reprints, dedicated badge software can reduce the amount of template setup and troubleshooting. ConferenceBadge.com, for example, lets planners upload registered attendees from Excel or CSV, map spreadsheet columns to badge fields, customize a design, and produce PDF badges or professionally printed credentials.
The right approach depends on how many badges are needed, how complex they are, and how much operational risk the event team can accept.
What You Need Before Printing Name Badges from Excel
Before we get started about badge printing from Excel; here’s what our CEO Amanda Collett has to say about the practice as a whole:
The most successful badge projects begin before anyone opens the Mailings tab. The planner first needs to understand what will be printed, how it will be worn, and which system will produce it.
At minimum, the workflow requires an attendee or employee list in Excel, a badge template, printable badge stock, and a printer. However, the physical and digital components must match. A well-built merge is still unusable if the Word template is designed for the wrong product number or if the printer scales the page.
Most planners will need:
An Excel spreadsheet containing attendee or employee data
Microsoft Word, Avery Design & Print, or badge printing software
Badge sheets, label sheets, card stock, or printable inserts
A compatible printer
Badge holders, clips, or lanyards when required
The correct badge dimensions or template product number
A high-resolution event logo
Optional attendee category, barcode, registration ID, or QR code data
The event use cases determine which of these elements matter most. A 30-person board meeting may only require a name, organization, and simple clip. A large exhibition may need attendee categories, access control data, sponsor branding, and QR codes for events. The second project involves more than printing names; it involves producing an operational credential.
This distinction affects the customer journey. Before the event, clean data helps registration teams prepare efficiently. At check-in, clearly organized badges help staff find names quickly. Inside the venue, readable credentials make introductions easier. Afterward, scan data and post event survey questions may help the planning team evaluate attendance and engagement.
When badge planning is reduced to “put names on paper,” those connected needs tend to be discovered too late.
Step 1: Prepare Your Excel Spreadsheet
The spreadsheet is the foundation of the entire process. Each row should represent one person, and each column should represent one type of information that may appear on the badge or support event operations.
A basic attendee list could look like this:
| First Name | Last Name | Company | Job Title | Attendee Type | QR Code |
|---|---|---|---|---|---|
| Maya | Patel | Northstar Labs | Product Manager | Speaker | 123456 |
| James | Lee | BrightCo | Marketing Director | Attendee | 123457 |
| Elena | Rodriguez | Summit Health | VP of Operations | Sponsor | 123458 |
This structure works because the column headings become the fields available inside the badge template. When Word displays Insert Merge Field, it uses the spreadsheet headers to create options such as First Name, Company, and Attendee Type.
Clear headings matter. A column named “Field 1” tells the designer very little. A column named “Attendee’s Full Name and Preferred Name Information” may be unnecessarily difficult to manage. Simple, unique labels such as First Name, Last Name, Company, Job Title, and Badge Type are easier to recognize and map.
Microsoft advises users to complete spreadsheet changes before connecting the file to Word, place the relevant data on one sheet, and use column names that correspond to the desired merge fields.
Before beginning the merge:
Keep one attendee per row
Use one field per column
Remove empty rows above or within the data
Avoid merged cells
Check names, companies, and job titles for spelling errors
Use consistent capitalization
Separate first and last names when the design treats them differently
Sort the list when badges need to be organized alphabetically
Save the document as an xlsx file when possible
Close the workbook before connecting it to Word
Older xls files may still work, and many platforms also accept a csv file. However, xlsx is generally the most practical working format when the list is being maintained in modern Excel.
The requirement to separate first and last names is especially important for event design. A template may use the first name at 30 points and the last name at 18 points. That hierarchy cannot be created reliably when both are stored in a single field.
A university event team learned this after preparing badges for a leadership conference. Its original spreadsheet stored each attendee’s name in one column. The design looked good for short names, but long names wrapped unpredictably and forced the entire line into a smaller font. By splitting the field into first and last name columns, the team was able to keep first names prominent and let longer surnames use a controlled second line.
The data did not fundamentally change. Its structure became better suited to the badge’s purpose.
Cleaning the Data Before It Reaches the Template
Mail merge reproduces what it receives. It does not know that “VICE PRESIDENT,” “Vice-President,” and “VP” are meant to follow the same editorial style. It also does not know that an empty company field should cause the job title to move upward.
For this reason, the attendee list should be treated as production data rather than a casual contact sheet.
Look for accidental spaces, inconsistent capitalization, duplicate rows, blank category fields, placeholder entries, and formulas that display unexpected values. If the badge will contain a barcode or registration number with leading zeros, verify that Excel has not removed those zeros by interpreting the field as a number.
The safest design also anticipates missing information. Not every attendee will have a company or job title. If the template leaves an obvious blank line whenever a value is missing, the finished badge can look incomplete. Dedicated badge platforms often provide conditional layout tools, while Word users may need to simplify the design or apply advanced merge rules.
The planning team should also limit the data collected and printed. A badge does not need a phone number, email address, home address, or other personal information unless there is a clear operational reason to display it. The spreadsheet may contain additional registration data, but only necessary fields should be exposed through the printed credential.
Step 2: Choose a Name Badge Template
Once the data is clean, the next decision is physical: what kind of badge will attendees actually wear?
Possible formats include:
Microsoft Word label templates
Avery badge templates
Custom Word tables
Event badge insert templates
PDF badge layouts
Laminated or plastic credentials
The template must correspond to the exact stock being printed. A template for 2.25" × 3.5" badges will not align correctly with a 3" × 4" sheet. Even two products that appear to have the same badge dimensions can use different margins, gaps, or page positions.
Common event badge sizes include:
| Format | Common Use |
|---|---|
| 2.25" × 3.5" | Meetings and business-card-style name badges |
| 3" × 4" | Conferences, seminars, and corporate events |
| 4" × 6" | Large conferences, networking events, and trade shows |
| Horizontal inserts | Staff, exhibitors, and access credentials |
| Custom sizes | Festivals, VIP credentials, and specialized event use cases |
A small badge works when the design only contains a name and company. Larger event badge sizes become valuable when the layout must include an attendee category, job title, sponsor logo, QR code, or access indicator.
The venue also affects this choice. In an intimate boardroom, attendees will generally interact at close range. In a large exhibition hall or wide conference room layout, names may need to be readable from several feet away. Selecting a compact badge purely because it is inexpensive can weaken networking throughout the event.
The template decision is therefore part of the attendee experience, not merely a page setup choice.
Matching the Template to the Product Number
Commercial label and badge sheets usually display a vendor and product number on the packaging. Word uses that information to load the correct page dimensions, label size, margins, and spacing.
Microsoft’s label workflow directs users to select the label vendor and product number through Label Options.
If the exact product is unavailable, a custom template can be created, but every measurement must be confirmed:
Page size
Badge width and height
Number of rows and columns
Top and side margins
Horizontal and vertical pitch
Space between badges
Printer’s nonprintable area
This is where many do-it-yourself projects begin to drift. A difference of one or two millimeters may seem insignificant on the first badge. Across several rows, that small error compounds until the lower badges no longer align with the stock.
A test print is not an optional final check. It is how the team confirms that the digital template and physical product genuinely match.
Step 3: Open Microsoft Word and Start Mail Merge

Microsoft Word remains one of the most accessible ways to create labels from a list in Excel because many organizations already use Microsoft 365. The planner does not need to type every name into a separate badge. Word treats the badge layout as a repeating document and fills it with successive spreadsheet records.
For a standard sheet-based workflow in the desktop version of Word:
Open Microsoft Word.
Select the Mailings tab.
Choose Start Mail Merge.
Select Labels.
Open Label Options.
Select the label vendor.
Choose the appropriate product number.
Confirm the selection.
Users who prefer guided instructions can choose the Step-by-Step Mail Merge Wizard. Microsoft’s own training materials describe a workflow that begins with Mailings, Start Mail Merge, the wizard, and Labels.
The exact menu wording may differ slightly between Word versions, operating systems, and subscription editions. The basic relationship remains the same: Word creates the page layout, while Excel supplies the changing information.
The phrase how to print labels from Excel often suggests that Excel itself performs the complete task. In the conventional Microsoft workflow, that is not quite what happens. Excel prepares and stores the list. Word configures and prints the individualized labels or badges.
Creating a Custom Badge Layout in Word
A standard label template is convenient when the badge stock is already listed. A custom table may be more appropriate when the planner is printing inserts, cards, or a nonstandard size.
The Word table should match the number and dimensions of the badges on each page. Cell height and width need to be set precisely, and internal cell margins should leave enough safe space around names, logos, and codes.
Turning on View Gridlines makes the table structure easier to see while designing. The gridlines are visual guides and do not necessarily print as borders.
A custom layout offers more creative control, but it also creates more opportunity for error. Word may move a row to the next page, adjust spacing, or respond unexpectedly when a logo changes size. That is one reason planners should avoid adding content directly into every cell before the first badge is stable.
Design the first badge, confirm its measurements, and only then propagate the format across the page.
Step 4: Connect Your Excel File to Word
With the label or badge page open, Word needs to know where the recipient data is stored.
In the Mailings tab:
Choose Select Recipients.
Select Use an Existing List.
Locate the Excel file.
Choose the correct worksheet.
Confirm that the first row contains headers.
Microsoft lists Excel as a suitable mail merge data source when the information is well formatted and kept on one readable sheet.
When the workbook contains multiple tabs, Word will ask which worksheet or named range should be used. This is easy to overlook. An event coordinator may select an old registration tab instead of the final attendee list and only discover the problem after previewing outdated records.
Worksheet names should therefore be descriptive. “Final Badge List” is easier to identify than “Sheet3.”
If fields do not appear correctly, return to Excel and inspect the first row. Headers should be unique and should not be preceded by a title, logo, explanatory paragraph, or blank row.
Step 5: Design the First Badge

The first badge functions as the design master for the rest of the page. It should be completed and tested before the layout is copied to other positions.
A typical conference badge might contain:
«First Name» «Last Name»«Company»«Job Title»«Attendee Type»
A logo can be placed above or beside the attendee information. A QR code or barcode can occupy a consistent lower section. Category colors may distinguish speakers, sponsors, exhibitors, staff members, and VIPs.
The font event name tag decision should be made at actual print size. A first name that appears enormous on a monitor may be entirely appropriate on a badge worn in a crowded room. Conversely, a refined 12-point font may be nearly useless for networking.
The first name should generally be the most prominent element. The last name may be the same size or slightly smaller. Company and job title should remain readable but secondary.
A badge should not try to display the entire registration record. Every addition competes for limited space. When the front includes multiple sponsor marks, a full agenda, contact details, social handles, and several categories, the attendee’s identity becomes harder to find.
A double-sided badge may be a better solution. The front can support recognition and scanning, while the reverse holds an agenda, Wi-Fi details, sponsor information, or emergency instructions.
Designing Around the Holder and Lanyard
A digital layout does not show how the finished badge will hang.
Leave sufficient room for the badge holder seam, lanyard slot, or clip. Names and QR codes should not sit directly beneath the attachment point. If the badge uses a plastic holder, confirm how much of the insert remains visible after it is loaded.
This is particularly important with inserts holders badges. The outer holder may be larger than the insert, and the welded seams may cover part of the printed area.
Landscape badges also need stability. A wide credential attached at one central point may rotate or flip more easily than a portrait badge. Dual-hook lanyards can help, but they require correctly positioned slots.
The design should be tested while worn, not only while lying flat on a desk.
Step 6: Insert Mail Merge Fields
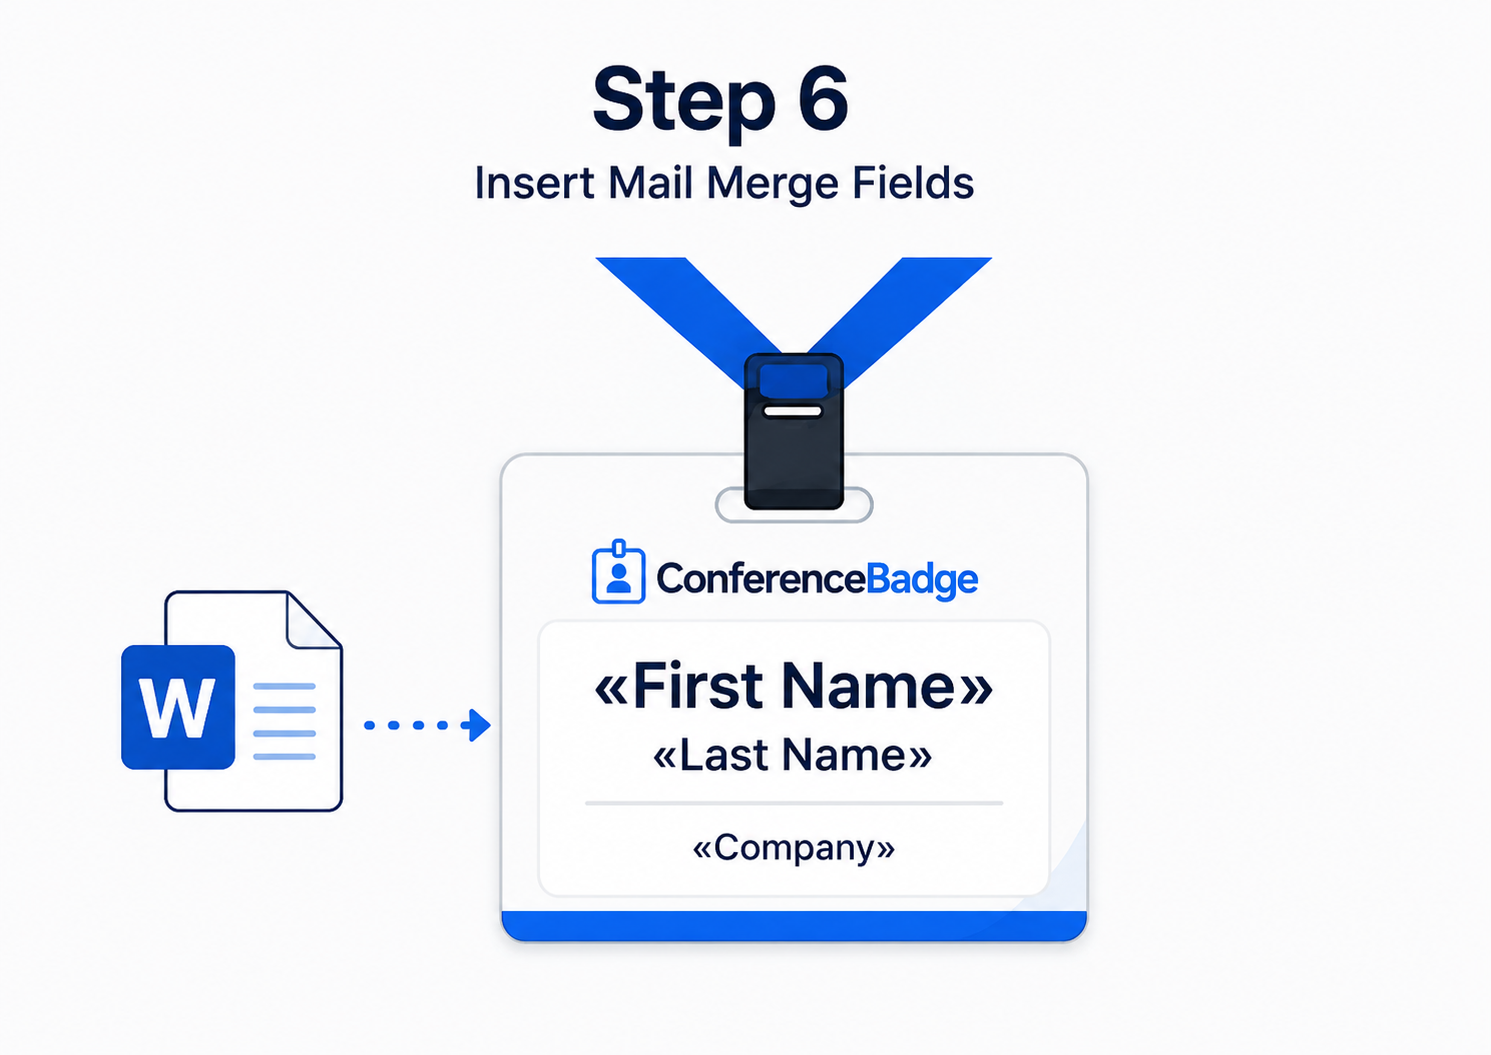
Once the static design elements are in place, the spreadsheet fields can be inserted.
To add the attendee name:
Click where the first name should appear.
Select Insert Merge Field.
Choose First Name.
Add a normal space.
Select Insert Merge Field again.
Choose Last Name.
Repeat the process for Company, Job Title, Attendee Type, registration ID, or any other required data.
Microsoft’s guidance explains that individual fields can be inserted by clicking in the desired location and choosing them from the Insert Merge Field menu.
Before previewing, the document should display field names such as:
«First_Name» «Last_Name»«Company»«Job_Title»
The fields can be formatted like normal text. They can be centered, resized, bolded, recolored, or placed inside a text box. The formatting belongs to the template; the words belong to Excel.
For a sheet containing several labels or badges, choose Update Labels after the first badge is complete. Word copies the design and merge-field structure across the remaining positions. Microsoft also documents Update Labels as the way to reproduce the first label design across a sheet.
Skipping this step can leave only the first badge correctly configured.
Why the Next Record Rule Matters
Every badge after the first needs to advance to the next spreadsheet row. Word normally handles this through a Next Record rule.
If the rule is missing, every position on the sheet may show the same person. Microsoft’s rule documentation explains that Next Record directs Word to use the following data record in the next location.
A properly updated sheet may display something similar to this in later cells:
«Next Record»«First_Name» «Last_Name»
Users do not usually need to insert this rule manually when the label merge and Update Labels functions have been used correctly. It becomes an important troubleshooting clue when the same name appears throughout the page.
Step 7: Preview the Name Badges

The preview stage is where the abstract merge becomes a real production document.
Select Preview Results, then use the record arrows to move through the attendee list. Microsoft includes this as a core part of its Excel mail merge workflow.
Do not review only the first few names. Find the records most likely to stress the design:
The longest first and last name
The longest company name
The longest job title
A record with an empty company field
A record with several filled fields
Each attendee category
Records containing punctuation or accented characters
Any record associated with a barcode or QR code
A conference organizer may preview “Ian Wu, Acme” and conclude that the design has ample space. That same design may fail for “Alexandria Montgomery, International Association of Municipal Administrators.”
The best review approach is to identify extreme records intentionally. The template should be evaluated against the data most likely to break it.
When reviewing the results, confirm that:
Every badge displays a different person
Names are not cut off
Company names wrap predictably
Empty fields do not create awkward spacing
Category colors or labels appear correctly
Logos remain fixed and sharp
Barcodes and QR codes remain correctly sized
Text stays clear of edges, holes, and holder seams
The phrase preview your labels can sound like a cosmetic step. It is actually quality assurance for the entire attendee experience.
Step 8: Print a Test Sheet

A digital preview cannot reveal printer scaling, page drift, stock feeding issues, or real-world readability.
Print one test page on plain paper before loading the actual badge sheets. Set the printer to Actual Size, 100%, or No Scaling, depending on the available terminology. Avoid options such as Fit to Page unless the template provider specifically instructs otherwise.
Then place the plain-paper test behind or over an unused badge sheet and hold both against a light source. This makes it easy to see whether each design aligns with the cut lines or perforations.
Check:
Top and side alignment
Drift across lower rows
Paper size
Portrait or landscape orientation
Printer tray selection
Font readability
Logo sharpness
Barcode and QR code scanning
Whether any design element crosses a perforation
Single-sided or double-sided settings
Print quality and ink density
The printer model matters. Some office printers cannot print close to the page edge. Others feed thick card stock inconsistently. A template that worked on one device may shift slightly on another.
The test should use the actual production printer whenever possible. For QR codes for events, test the code from the finished output using the same phones or scanners expected at check-in. A code that works on a monitor may behave differently when printed small, laminated, or placed behind reflective plastic.
Do not print the full batch until the test sheet is correct.
A Mini-Case: The Half-Inch Error That Reached the Registration Desk
A corporate events team once created 400 name badges using a template that looked correct on screen. The first page printed only slightly high, so the team assumed the difference was harmless. By the fourth row, names were touching the perforation. On later sheets, several badges printed across the cut line.
The cause was not the Excel list or the mail merge. The printer had applied a Fit setting that reduced and repositioned the page.
The team corrected the setting to 100%, printed a fresh test, and then produced the batch. The practical lesson was larger than “turn off scaling.” Print validation needed to happen before the evening prior to the event, when there was still time to adjust the workflow or use a different printer.
Step 9: Complete the Merge and Print
Once the preview and test page are correct, return to the Mailings tab and select Finish & Merge.
Word will usually offer options such as:
Edit Individual Documents
Print Documents
Send Email Messages
For badges, choose Print Documents to send the merge directly to the printer, or choose Edit Individual Documents to generate a new Word file containing the full merged output.
Microsoft describes Finish & Merge and Print Documents as the final stage of the spreadsheet mail merge workflow.
Creating an individual merged document gives the event team one more opportunity to inspect every page. It also makes it easier to save a PDF copy.
Saving PDF badges is valuable for three reasons. First, the PDF preserves the layout if the file must be opened on another computer. Second, it creates a record of what was printed. Third, it supports controlled reprints without requiring the team to rebuild the mail merge.
The source Excel file, Word template, and merged PDF should be stored together with clear filenames. “Leadership_Summit_Badges_Final_2026.pdf” is easier to identify during registration than “Document7-final-final2.pdf.”
How to Print Name Badges from Excel Using Avery Templates
Avery offers two common routes: using an Avery-compatible template in Word or importing spreadsheet data into Avery Design & Print.
The Word method closely follows the conventional mail merge process. The user identifies the Avery product number in Label Options, connects the Excel list, inserts merge fields, updates the remaining labels, previews the results, and prints a test page.
Avery Design & Print provides a browser-based alternative. Its official instructions allow users to arrange spreadsheet information in columns, import the data, map the fields, and place the merged information into labels, cards, or badges.
The typical Avery workflow is:
Find the product using its Avery number.
Select a compatible design or blank template.
Choose the option to import data.
Upload the Excel spreadsheet.
Select the columns to use.
Arrange the fields inside the first badge.
Apply the design across the full set.
Preview each badge.
Print a plain-paper test.
Print the final stock.
Avery is useful when the physical product is already chosen because the page setup is tied directly to the stock number. This reduces the chance of manually entering incorrect margins or spacing.
However, imported spreadsheet formatting does not necessarily transfer into the badge design. Avery notes that font styling or image formatting contained inside Excel may not merge into Design & Print. The spreadsheet should therefore be treated as data, not as the visual design.
Can You Convert Excel to Avery Labels?
Yes. An Excel spreadsheet can be imported into Avery Design & Print, or it can be connected to an Avery label template in Microsoft Word. Each spreadsheet column becomes a potential badge or label field, and each row becomes a separate printed item.
The conversion is not simply a file-format change. The spreadsheet data must still be mapped into a design that matches the correct Avery product.
This distinction matters because two users may upload the same attendee list and create entirely different results. One may produce address labels, while the other creates name badges. The Excel file provides the variable content; the Avery template provides the format.
How to Print Conference or Event Badges from Excel
A conference badge often carries more operational information than an ordinary office name tag. Along with names and companies, it may include:
Speaker, sponsor, exhibitor, VIP, staff, or attendee status
Registration ID
Barcode or QR code
Access category
Meal or session designation
Pronouns
Table assignment
Event logo
Sponsor mark
The Excel list should include a separate column for each field that may influence the badge.
For example:
| First Name | Last Name | Company | Badge Type | Access Zone | QR Code Data |
|---|---|---|---|---|---|
| Nina | Shah | Brightwell | Speaker | All Access | EVT-001425 |
| Marcus | Brown | Delta Systems | Exhibitor | Expo Hall | EVT-001426 |
This structure allows the event team to sort the list, filter specific categories, and create different production groups. Staff badges can be printed separately from attendee badges. VIPs can receive a different color band. Exhibitors can be organized by company for pickup.
Sorting alphabetically before printing may help registration workers locate badges quickly. However, the team should think about how the badges will be distributed. If check-in desks are divided by company, department, or ticket type, a different sort order may be more efficient.
A large association event learned this when it printed 1,200 badges alphabetically but organized registration by membership chapter. Staff had to move between boxes for almost every guest. The next year, the team sorted the Excel spreadsheet first by chapter and then by surname. The printing process did not change, but badge retrieval became much faster because production reflected the registration workflow.
This is why event badge printing decisions should begin with the attendee journey rather than the document template.
Walk-Ins, Late Registrations, and Badge Reprints
The main badge batch is only part of the event. Names change, speakers cancel, guests register late, and attendees arrive with updated titles.
The team needs a reprint workflow before registration begins.
For smaller events, a laptop, Excel file, Word template, and office printer may be sufficient. However, changing the source spreadsheet and rerunning a large mail merge for every walk-in can be slow.
A better approach may be to maintain a separate walk-in worksheet or use on site printing software that can search, edit, and produce one badge at a time. The goal is consistency: a late registrant should receive a credential that looks like every other badge, not a handwritten sticker or one of the event’s DIY name tags.
On site printing becomes especially valuable when attendance data is still changing close to the event. It reduces waste from preprinting uncertain registrations and gives staff more control over corrections.
The tradeoff is operational complexity. Printers, laptops, stock, network access, and staff training must all work at the registration desk. A backup printer and an offline attendee list may be necessary for larger events.
Using ConferenceBadge.com With an Excel Attendee List
Dedicated badge platforms provide an alternative when the planner does not want to build and troubleshoot a Word mail merge.
ConferenceBadge.com allows event teams to upload registered attendees from an Excel or CSV list, map the spreadsheet columns, choose a badge format, customize the design, and produce printed or PDF badges. Its help documentation describes creating a new event from Excel and matching attendee information to imported spreadsheet columns.
This approach can be useful when:
The badge design is more complex than a standard office label
Different attendee categories need visual rules
The event uses custom event badges
QR codes or variable data must be created consistently
The organizer wants professionally printed Cardboard Badges
Badges must arrive preloaded into holders
The team needs PDFs for self-printing
Eventbrite or other badge integrations are part of the workflow
A consistent reprint process is important
ConferenceBadge.com also supports custom QR code data through an appropriately named spreadsheet column. Its documentation instructs users to create a “QR code data” column when importing custom information for code generation.
The thoughtful role for badge software is not to replace Excel. Excel often remains the most familiar place for the event team to review and organize attendee data. The platform replaces the more fragile steps of building repeating templates, managing visual conditions, and preparing output.
What About Name Badges from Google Sheets?
The same data principles apply to name badges from Google sheets. Each row should represent one person, and each column should represent one field.
Depending on the chosen badge software, a Google Sheets list may need to be exported as xlsx or csv before it can be imported. The event team should perform that export after the final data review so that the downloaded file reflects the current registration list.
A common failure occurs when several staff members continue editing Google Sheets after an Excel or CSV copy has been exported. The cloud sheet appears current, but the badge team is working from an older local version.
To avoid that split, establish a clear cutoff time and designate one file as the production source.
Can You Print Name Badges Directly from Excel?
Technically, yes. A user can size Excel cells, place names inside them, configure print areas, and print a simple badge sheet directly from Excel.
For most multi-badge projects, however, Excel is not the strongest layout tool. Page breaks, margins, cell dimensions, image placement, and repeating label structures can be difficult to control. A spreadsheet that looks correct in the workbook may shift when printed on another computer or printer.
Excel is generally more reliable as the data source, with Word, Avery Design & Print, or badge software handling the layout.
Direct Excel printing may still make sense when:
Only a few badges are required
The badge stock is plain card stock rather than a perforated sheet
The layout is extremely simple
The user is comfortable controlling print areas and cell dimensions
The badges will be cut manually
For anything involving hundreds of attendees, precise label stock, logos, or codes, a proper merge or badge platform is usually more dependable.
Printing Without Microsoft Word
A common question is how to print labels from Excel without Word. Several alternatives exist:
Import the spreadsheet into Avery Design & Print
Upload it to dedicated badge software
Export it as CSV for an online label platform
Generate PDF badges through an event badge service
Build a layout in another desktop publishing application
Use event registration software with built-in badge printing
Avery Design & Print is practical for standard retail badge sheets. Conference badge software is more appropriate when the badges need stronger event branding, attendee categories, scannable codes, or professional production.
The deciding factor is not whether Word is available. It is how much precision, customization, and event-day support the project requires.
Printing Barcodes and QR Codes From Excel Data
It is possible to print a barcode or QR code using data stored in Excel, but a normal text mail merge does not automatically convert a number into a scannable image.
There are several ways to do it:
Use a barcode font for a supported linear barcode format
Generate barcode images in advance and merge image paths
Use an Avery or badge platform with a barcode generator
Use event software that converts registration IDs into codes
Import custom QR code data into a supported badge platform
The code should generally contain a unique identifier rather than unnecessary personal information. When scanned, that ID can connect to the attendee record in the registration or lead-retrieval system.
Codes should be tested at the final print size, on the final stock, and through any holder or laminate. High contrast and clear space around the code are essential. Stretching a barcode image or reducing a dense QR code too aggressively may make it unreadable.
A 3" × 4" badge may support a code when the design remains simple. A larger badge provides more flexibility when the name, company, attendee category, event logo, and code must all remain prominent.
Troubleshooting Common Problems When Printing Badges From Excel
The Badges Are Not Aligned
Misalignment usually comes from a mismatch between the digital template, printer settings, and physical stock.
Check that the correct vendor and product number were selected. Confirm the paper size and orientation. Disable printer scaling and print at 100%. If the first row aligns but later rows drift, inspect the vertical pitch and the gaps between labels.
Printer feed variation can also cause movement. Thick stock may not travel through the device as consistently as ordinary paper.
Do not compensate by dragging individual names around the page. Correct the underlying template or print setting so the solution applies to every badge.
Every Badge Shows the Same Name
This usually means the later badge positions are not advancing to the next record.
Use Update All Labels or Update Labels after completing the first design. Confirm that Word added the Next Record rule to subsequent positions. Then use Preview Results to verify that each badge displays a different attendee.
Excel Fields Are Not Showing in Word
Close the Excel workbook and reconnect it. Confirm that the correct worksheet was selected and that the first row contains simple, unique column headers.
Remove blank rows above the headers and save the file as xlsx. If the data began as a CSV, open it in Excel and verify that each field appears in the correct column before starting the merge.
Long Names Are Cut Off
Test the longest names before printing. Reduce the type size modestly, allow controlled wrapping, or place the first and last names on separate lines.
Do not solve every long-name problem by shrinking all badges to an unreadable font. A larger badge size or a simplified layout may be the better decision.
Every Field Runs Together
Spaces and line breaks must be inserted into the Word template around the merge fields. Word does not automatically add them.
For example:
«First_Name» «Last_Name»
requires a normal space between the two fields. Company and job title should generally be separated with paragraph breaks.
Blank Fields Leave Awkward Gaps
A missing company or job title may create an empty line. Simplify the layout so optional fields do not control too much vertical spacing, or use conditional merge rules when appropriate.
Dedicated badge software may handle conditional fields more easily than a basic Word merge.
QR Codes Do Not Scan
Increase the code size, preserve its proportions, use strong contrast, and keep a clear quiet area around it. Avoid placing it near perforations, lanyard holes, or reflective seams.
Test it with the actual phone or scanner. A code that scans from the design file may still fail after printing.
Logos Look Blurry
Use a high-resolution or vector logo. Do not copy a small image from a website and enlarge it.
The logo should be inserted into the badge template rather than stored as visual formatting inside the spreadsheet.
Gridlines Are Printing
Word table gridlines and printed borders are different. Use View Gridlines for layout assistance, but remove any actual table borders that should not appear on the badges.
The Wrong Attendees Are Appearing
Confirm that the correct spreadsheet, worksheet, and filter selection are connected. Check the Select Recipients list for excluded or duplicated records.
This problem is especially common when the team has several files called “final.”
Best Practices for Printing Name Badges From Excel
The strongest workflow is less about knowing where each Word button is located and more about protecting the data-to-print process.
Clean the list before designing around it. Use one row per person and one field per column. Test the layout with difficult records rather than ideal examples. Keep the first name large enough to support introductions. Use a template that matches the physical badge stock exactly.
The production team should also:
Keep spreadsheet headers simple
Standardize capitalization and job-title style
Remove duplicate registrations
Confirm event badge sizes before design begins
Leave safe margins around all important content
Keep logos high resolution
Print at actual size
Test barcodes and QR codes
Save a merged PDF
Protect attendee information
Maintain a clear reprint process
Keep extra badge stock available onsite
The workflow should be documented well enough that another team member can complete a reprint without calling the original designer.
Name Badge Printing Checklist
Before sending the complete badge set to print, confirm:
The Excel file has been proofread
There is one attendee per row
Column headers are clear and unique
The final worksheet has been selected
Duplicate attendees have been removed
Badge dimensions are confirmed
The template matches the stock product number
Merge fields are inserted correctly
The layout has been updated across all badges
Every position displays the next record
Long names and companies have been checked
Optional fields do not create awkward gaps
QR codes or barcodes have been tested
The printer is set to actual size
A plain-paper test page has been printed
The final output has been reviewed
A PDF backup has been saved
Extra stock is available for reprints
A checklist becomes valuable because badge errors often come from small interactions between systems. The spreadsheet can be correct, the template can be correct, and the printer can still scale the page. Quality control needs to cover the complete chain.
When a Mail Merge Is Enough—and When It Is Not
Word mail merge is a good fit for small and medium-sized events with a stable list, conventional badge stock, and a relatively simple design. It is familiar, inexpensive, and flexible enough to handle names, companies, titles, and basic categories.
Its limitations become clearer as the event grows. Complex conditional designs, personalized images, double-sided production, automatic QR codes, integrations, and rapid onsite reprints may require additional tools or manual work.
Conference badge alternatives such as Avery Design & Print or a dedicated event badge platform become valuable when they reduce production risk. The best tool is not necessarily the one with the most features. It is the one that matches the event’s operational complexity.
For a 40-person faculty workshop, Word may be entirely sufficient. For a 2,000-person trade show with exhibitors, speakers, sponsors, access zones, and lead scanning, badge integrations and dedicated event badge printing software may save significant time and labor.
The scale of the workflow should follow the scale of the consequences.
Frequently Asked Questions
Can you convert Excel to Avery labels?
Yes. You can import an Excel spreadsheet into Avery Design & Print or connect the spreadsheet to an Avery template through Microsoft Word mail merge. Each Excel row becomes a separate label or badge, while the selected Avery product determines the page layout.
How do you print names on labels from Excel?
Prepare one person per row in Excel, open a matching label template in Word, choose Start Mail Merge, select Labels, and connect the spreadsheet through Select Recipients and Use an Existing List. Insert the appropriate merge fields, preview your labels, print a test page, and then complete the merge.
Can you make Avery labels from an Excel spreadsheet?
Yes. Avery Design & Print can import organized spreadsheet data, and Avery-compatible templates can also be used with Word mail merge. In either workflow, confirm that the Avery product number matches the physical sheets.
How do you print labels from Excel without Word?
Import the Excel or CSV file into Avery Design & Print, dedicated badge software, or another label platform. ConferenceBadge.com also supports Excel and CSV attendee imports for creating printed or PDF event badges without building a Word mail merge.
Can I use an Excel file directly?
You can use an Excel file directly as the data source for Word mail merge and for platforms that support Excel imports. Excel can also print a manually designed layout, but it is usually less reliable for precise multi-badge page alignment.
How do you design an ID card in Microsoft Word using mail merge?
Create a Word table or label template that matches the ID card dimensions, connect the Excel data through Select Recipients, and insert merge fields for the person’s name, ID, department, or role. Add the static logo and design elements in Word, preview each record, and print a test before producing the full batch.
Can I print barcodes using this method?
Yes, but Word does not automatically turn ordinary Excel text into a barcode image. You need a compatible barcode font, pre-generated barcode images, or a badge platform with built-in code generation. Test every barcode at its final printed size.
What is the process for printing name badges using data from an Excel spreadsheet?
Clean the Excel attendee list, choose a badge template that matches the stock, start a mail merge in Word or import the spreadsheet into badge software, map the fields, design the first badge, preview every record, print a test sheet, and then print the final badges.
What steps are needed to print name badges from an Excel spreadsheet?
Use one attendee per row and clear column headers. Connect the workbook to a badge template, insert fields such as first name, last name, company, and title, update the design across the full sheet, preview long records, test the alignment, and save the completed output before printing.
How do I create and print name badges using Excel data?
Treat Excel as the data source and a badge template as the visual layer. Import or connect the Excel file, assign each spreadsheet column to a badge field, format the template, review the merged records, and print at actual size on compatible badge stock.
What is the process to print name badges from an Excel list?
The process is data preparation, template selection, file connection, field insertion, preview, test printing, final merge, and production. Keeping those stages separate makes errors easier to identify and correct.
Can I use mail merge to create name badges?
Yes. Microsoft Word mail merge can combine an Excel list with a repeating badge or label template. This is one of the most common ways to create different names on each badge.
Why are my name badges not lining up?
The most common causes are an incorrect template, the wrong product number, printer scaling, mismatched paper size, inaccurate margins, or stock feeding inconsistently. Print on plain paper at 100% and compare it with the badge sheet before making changes.
Can I add logos to name badges from Excel?
Yes, but the logo is normally added to the Word, Avery, or badge software template rather than the Excel spreadsheet. Excel supplies the changing attendee data; the template supplies the consistent branding.
Can Excel print different names on each badge?
Excel can store a different name in every row, but Word mail merge or badge software is generally used to place those names into separate badge positions. This provides more control over alignment, spacing, typography, and printing.
