
How to Print Name Badges from Google Sheets
Quick summary: You can print name badges from Google Sheets by using the spreadsheet as your attendee data source and connecting it to a Google Docs template, a mail merge add-on, an Avery-compatible design tool, or dedicated event badge software. Google Sheets holds the changing information—such as names, companies, job titles, attendee categories, and registration IDs—while the template controls the badge dimensions, branding, layout, and final print format. The most reliable process is to clean the spreadsheet, choose the physical badge format, connect the data to a label or badge template, generate the badges, export them to PDF, and print a test page before producing the full set.
For a small meeting, manually typing ten names into a document may be manageable. For a conference with 300 attendees, several ticket categories, late registrations, long job titles, and personalized QR codes, that same approach quickly becomes unreliable.
Google Sheets is useful because it gives the event team one shared place to manage the attendee list. A registration coordinator can correct a company name, an HR leader can confirm employee titles, and an event planner can sort the final list for check-in without sending new spreadsheet versions back and forth.
The spreadsheet, however, is only the data layer. It is not usually the best place to create the finished badge layout. To produce printable name tags, the data needs to move into a label template, Google Docs document, Avery design, or event badge platform.
A basic workflow looks like this:
Prepare the Google Sheets list.
Confirm the badge size and physical stock.
Select a badge or label template.
Connect the sheet through a mail merge tool or import.
Map the name, company, title, and category fields.
Generate the badges.
Export the finished set as PDF badges.
Print one test page.
Review alignment and readability.
Print the complete badge set.
This article explains each stage, but the more important question is why each stage matters. A badge is not simply a printed database record. It shapes registration speed, networking, access control, sponsor visibility, and the way attendees experience the event from the moment they arrive.
What You Need Before Printing Name Badges from Google Sheets
A leadership workshop may only need a person’s name and department. A university conference may require the attendee’s institution, academic role, and attendee category. A trade show badge may need a unique QR code, exhibitor status, access information, and event branding.
Most projects require:
A Google Sheets list containing names and badge data
A Google Docs template, mail merge add-on, Avery-style platform, or badge printing service
Label sheets, badge inserts, card stock, or another printable material
A compatible printer
Badge holders, clips, or lanyards when required
The correct badge dimensions or product number
An event or company logo
Optional QR codes, barcodes, registration IDs, or attendee categories
The order of these decisions matters. If the design is created before the physical format is selected, the event team may build a beautiful 4" × 6" layout and later discover that it purchased 3" × 4" holders. Scaling the design down will reduce the font size, QR code dimensions, margins, and overall readability.
The badge format should therefore be confirmed before the template is built.
Step 1: Prepare Your Google Sheets Data

A clean spreadsheet is the foundation of the entire badge workflow. Each row should represent one person, and each column should contain one type of information.
For example:
| First Name | Last Name | Company | Job Title | Attendee Type | Registration ID |
|---|---|---|---|---|---|
| Maya | Patel | Northstar Labs | Product Manager | Speaker | A1042 |
| James | Lee | BrightCo | Marketing Director | Attendee | A1043 |
| Alicia | Chen | Hartwell University | Dean of Student Affairs | VIP | A1044 |
This structure matters because most mail merge and badge tools use the first row as headers. Those headers become the merge fields available inside the design.
A field called First Name may become {{First Name}} in Google Docs. A field called Company may become a selectable data element in an Avery tool or event badge editor.
Clear headers reduce mapping mistakes. Vague columns such as “Info 1,” “Type,” or “Other” may be understandable to the person who created the sheet, but they become difficult to interpret when someone else takes over the badge project.
Before generating name badges from Google Sheets:
Use one attendee per row.
Use one type of data per column.
Remove blank rows from the attendee list.
Avoid merged spreadsheet cells.
Check spelling and capitalization.
Separate first and last names when they need different formatting.
Add an attendee type column for color coding or access levels.
Include a registration ID when badges require individual codes.
Sort by last name if badges will be organized alphabetically.
Remove personal information that does not need to be shared or printed.
The spreadsheet should be treated as production data, not simply as a contact list.
Why Separate Fields Create Better Badges
Separating first names, last names, companies, and job titles gives the designer more control.
For a networking event, the first name might appear in a large, bold typeface while the surname appears slightly smaller. That is difficult to achieve when the full name is contained in one cell.
The same principle applies to attendee types. If “Speaker,” “Sponsor,” “Staff,” and “Attendee” are stored in a dedicated field, the badge system can display them consistently or use them to create color-coded categories.
A regional university conference learned this after initially storing each attendee’s full identity in one column:
Dr. Maya Patel, Dean of Research, Northstar University
The data was readable in the spreadsheet, but it could not be styled effectively on the badge. After separating the information into four fields, the organizer could make “Maya” the main networking element, keep “Patel” readable, and place the title and institution beneath it in a controlled hierarchy.
The information stayed the same. The structured data made it usable.
Clean the Sheet Before Connecting an Add-On
A mail merge repeats whatever is stored in the spreadsheet. It does not know that “Vice President,” “VP,” and “V.P.” should follow the same style. It will also reproduce unnecessary spaces, inconsistent capitalization, and duplicate registrations.
The event team should review:
Duplicate attendees
Blank required fields
Accidental spaces
Inconsistent company names
Capitalization differences
Placeholder records
Formula errors
Old or canceled registrations
Leading zeros removed from registration IDs
If codes begin with zero, format those cells as text so Google Sheets does not alter the values.
The team should also decide which sheet tab is the official production source. A shared workbook may include tabs for registrations, cancellations, speakers, staff, and earlier exports. Naming the final tab “Badge Production List” makes it less likely that the wrong data will be merged.
Protect Attendee Data Before Using Add-Ons
Google Workspace makes collaboration easy, but third-party add-ons may request access to Sheets, Docs, Drive files, or account information.
Before installing a mail merge or label tool from the Google Workspace Marketplace, review:
The permissions it requests
Its privacy policy
Whether it stores spreadsheet data
Whether it shares information with other services
Its pricing or record limits
Whether it is approved by the organization’s IT team
Whether the sheet includes sensitive student, employee, or customer data
This matters for any event, but especially for universities, employers, associations, and health-related organizations that may be working with protected or confidential information.
Only the fields required for badge production should be shared with the tool. The event team can create a separate production sheet containing names, organizations, titles, categories, and registration IDs rather than giving an add-on access to the complete registration database.
Step 2: Choose a Name Badge Size or Template
Once the data is prepared, the team needs to confirm the physical badge format.
Common event badge sizes include:
Badge size
Best suited to
2.25" × 3.5"
Basic name tags, meetings, workshops, and office events
3" × 4"
Conferences, corporate events, and visitor credentials
4" × 6"
Trade shows, expos, networking events, and larger conferences
Business-card size
Small meetings and compact badge holders
Custom sizes
Festivals, VIP credentials, staff passes, and specialized events
The best size depends on how the badge will be used.
A small meeting held around one table may only need a simple name and department. A larger event with a wide conference room layout may require names to be recognized from farther away. A trade show badge may need more room for a company, job title, attendee category, sponsor logo, and QR code.
If the template does not match the physical paper or holder, the badges may not print correctly. A small difference in top margin or spacing may appear insignificant on the first row but become more obvious lower down the page.
The design should be based on:
The printable badge dimensions
The number of badges per sheet
The space between badges
The page size
The holder’s insert dimensions
Portrait or landscape orientation
Printer margin limitations
Lanyard hole or clip placement
A template designed for the holder’s outer dimensions rather than its internal insert size may produce badges that do not fit.
Method 1: Print Name Badges from Google Sheets Using a Mail Merge Add-On
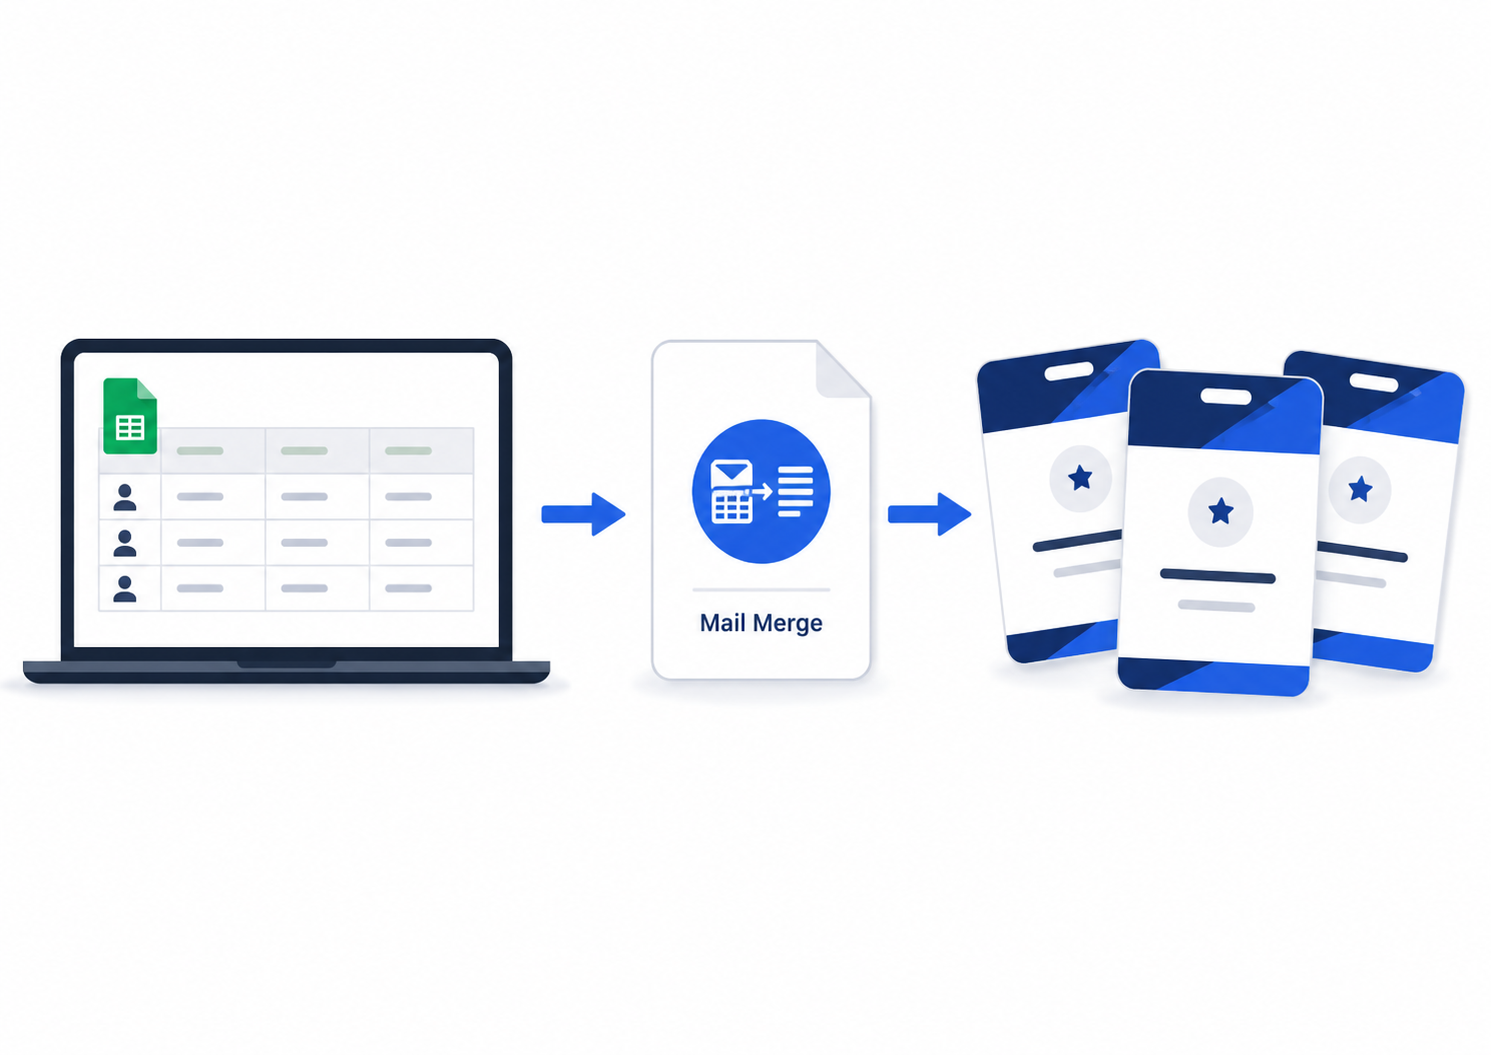
For many Google Workspace users, a label or mail merge add-on is the most practical way to print labels from Google Sheets.
The add-on connects a spreadsheet to a repeating template. It reads one row at a time and generates a separate badge or label for each attendee.
A typical workflow is:
Open the Google Sheet.
Select Extensions.
Choose Add-ons and then Get add-ons.
Search for a mail merge or label-making tool.
Review the permissions and privacy policy.
Install and open the add-on.
Choose the correct badge or label template.
Select the spreadsheet tab containing the attendee data.
Map the columns to the badge fields.
Generate the merged Google Doc or PDF.
Preview the badges.
Print a plain-paper test.
Print the final stock.
The Google Workspace Marketplace currently lists label tools that work with Google Docs and Google Sheets. For example, Labelmaker advertises templates compatible with Avery, SheetLabels, Online Labels, Herma, and other manufacturers.
Another Marketplace listing, Label Maker, states that it can generate Avery-compatible labels in Google Docs from thousands of templates.
These tools can be useful for name badges, address labels, mailing labels, and printable name tags. The important point is that the planner should choose the template according to the purchased stock rather than according to which example looks best on screen.
How Merge Fields Work
The add-on typically uses placeholders or merge fields that correspond with the spreadsheet headers.
A badge template might contain:
{{First Name}} {{Last Name}}{{Company}}{{Job Title}}{{Attendee Type}}
When the merge runs, the tool replaces those placeholders with the values from each spreadsheet row.
The exact placeholder format varies by product. Some tools use double braces, while others offer a menu from which the user selects fields. The critical requirement is that the field name matches the spreadsheet header.
If the sheet uses “First Name” but the template contains {{FirstName}}, the field may remain blank because the tool sees them as different labels.
Where This Method Works Well
A mail merge add-on is a good fit when:
The badge stock uses a standard label format
The design is relatively simple
The list is stable
There are no complicated design rules
The organization already works primarily in Google Workspace
The team is comfortable reviewing third-party tool permissions
The event only requires basic name badges
It becomes less efficient when the event has many visual categories, complex QR codes, double-sided printing, frequent reprints, or a large volume of last-minute changes.
Method 2: Print Name Badges from Google Sheets Using Google Docs

Google Docs can act as the visual template while Google Sheets stores the attendee information.
Unlike Microsoft Word, Google Docs does not provide the same native label-oriented mail merge workflow for badge production. Google’s own support community generally directs users toward Workspace add-ons or external tools for creating sheets of labels.
A manual Docs-based workflow usually involves:
Creating a Google Docs document
Inserting a table
Setting the table cells to approximate the badge dimensions
Adjusting cell padding and margins
Adding placeholders such as {{First Name}}
Using an add-on, Apps Script, or tool such as Autocrat
Generating a new document or PDF from the spreadsheet data
Printing the result at actual size
Autocrat is a general document merge tool that can use spreadsheet data to populate a Google Docs template. Because it is not specifically built around commercial badge sheets, the user may need to spend more time configuring the layout and page flow.
Why a Table Can Work
A table gives each badge its own defined space. This is useful when several badges need to appear on one page.
The planner can adjust:
Cell width
Cell height
Internal padding
Text alignment
Borders
Logo placement
Field hierarchy
The table approach is flexible, but Google Docs is still a flowing document editor. It may adjust page breaks or table behavior when the content changes. A long name, oversized logo, or unexpected blank line can affect the layout.
This makes testing essential.
A Mini-Case: When a Manual Google Docs Layout Became Fragile
An HR department created 120 employee event badges in a Google Docs table. The first test page looked correct, so the team continued adding logos and formatting.
Several attendees had long job titles. Those titles created extra lines, which increased the height of some cells and pushed later rows onto the next page. The team tried reducing individual font sizes, but the badge set gradually became inconsistent.
The solution was not another round of manual resizing. The team shortened the printed titles, introduced a maximum of two lines, and moved to a purpose-built label template with fixed dimensions.
The lesson was that a flexible document can become a liability when the output needs rigid physical alignment.
Method 3: Print Avery Name Badges from Google Sheets

Avery provides a direct route for users who have purchased Avery labels, cards, or name badge sheets.
Avery Design & Print can connect to Google Drive and import Google Sheets data. Avery’s official documentation explains that users can select Import Data or Mail Merge, connect Google Drive, and choose a spreadsheet for the project.
The typical workflow is:
Find the Avery product number on the package.
Open Avery Design & Print.
Select the matching product.
Choose a blank or predesigned badge layout.
Select Import Data or Mail Merge.
Connect Google Drive or upload the data.
Choose the correct Google Sheet.
Map the columns to the design.
Adjust the name, company, title, and logo positions.
Preview each badge.
Print a test page.
Print the final Avery labels or badges.
Avery states that its online software can import names and other information from spreadsheets into labels, cards, tags, and name badges.
The Product Number Matters More Than the Brand Name
Two Avery products may look similar but use different dimensions or spacing. The product number identifies the precise template.
If the planner chooses the wrong template, the first badge may appear close to correct while later rows drift out of alignment. The error becomes more obvious with every badge position.
This is why planners should not choose a template based only on a phrase such as “standard name badge.” The exact product number, page size, margins, and spacing need to match the physical stock.
Can You Use Templates From Other Label Brands?
Some Google Workspace label tools support templates from SheetLabels.com, OnlineLabels.com, Herma, Avery, and other manufacturers. The correct template should still be verified against the stock specifications.
Brand compatibility does not guarantee that two similarly named products use identical dimensions.
Will an Avery Word Template Work in Google Docs?
A Word template may open in Google Docs, but that does not mean it will preserve the precise layout needed for commercial label stock.
When a Word file is converted or edited in Docs, table widths, margins, font metrics, page breaks, and spacing may change. Even a minor conversion difference can misalign labels.
For this reason, it is safer to use:
Avery Design & Print with the correct product selected
A Google Workspace add-on that supports the exact Avery number
A template created specifically for Google Docs
A PDF generated from a verified badge platform
A Word template can be tested, but it should not be assumed to be print-ready simply because it opens successfully.
Method 4: Use Badge Printing Software for Events

Mail merge tools are designed primarily to place spreadsheet data into repeated layouts. Event badge platforms are designed around the wider registration and check-in workflow.
This distinction matters for:
Conferences
Trade shows
Association meetings
University events
Large corporate gatherings
Networking events
Events using QR codes
Events with multiple attendee categories
Events requiring on site printing
Events expecting walk-ins or badge reprints
Dedicated event badge software may allow the planner to:
Import spreadsheet data
Map attendee fields
Apply category-based colors
Add QR codes or barcodes
Generate PDF badges
Reprint individual attendees
Manage walk-ins
Print at the venue
Connect to registration platforms through badge integrations
This is where ConferenceBadge.com fits naturally into the workflow.
A planner can maintain the attendee list collaboratively in Google Sheets and then export the final production list as an Excel file or CSV. That file can be uploaded into ConferenceBadge.com, where the fields are mapped to the badge design.
The platform can then be used to generate downloadable PDFs, professionally printed Cardboard Badges, printed inserts and holders, or onsite badges.
ConferenceBadge.com currently offers PDF badge generation at custom dimensions, Avery-compatible output, professionally printed cardboard formats, inserts loaded into vinyl holders, laminated PVC badges, lanyards, and on-site printing support.
Moving a Google Sheet Into ConferenceBadge.com
The basic conversion path is:
Finalize the attendee information in Google Sheets.
Remove columns that are not needed for badge production.
Select File, Download.
Export the sheet as Microsoft Excel or CSV.
Upload that file to ConferenceBadge.com.
Match the spreadsheet columns with the badge fields.
Design the front and back of the badge.
Add logos, categories, QR codes, or access information.
Review the populated badges.
Download PDF badges or order printed products.
Exporting the list does not remove the value of Google Sheets. Sheets remains the collaborative planning environment. The badge platform becomes the controlled production environment.
This conversion makes sense when a planner has outgrown a standard label merge but does not want to abandon the shared spreadsheet process the team already understands.
Method 5: Using Google Sheets With ConferenceBadge.com
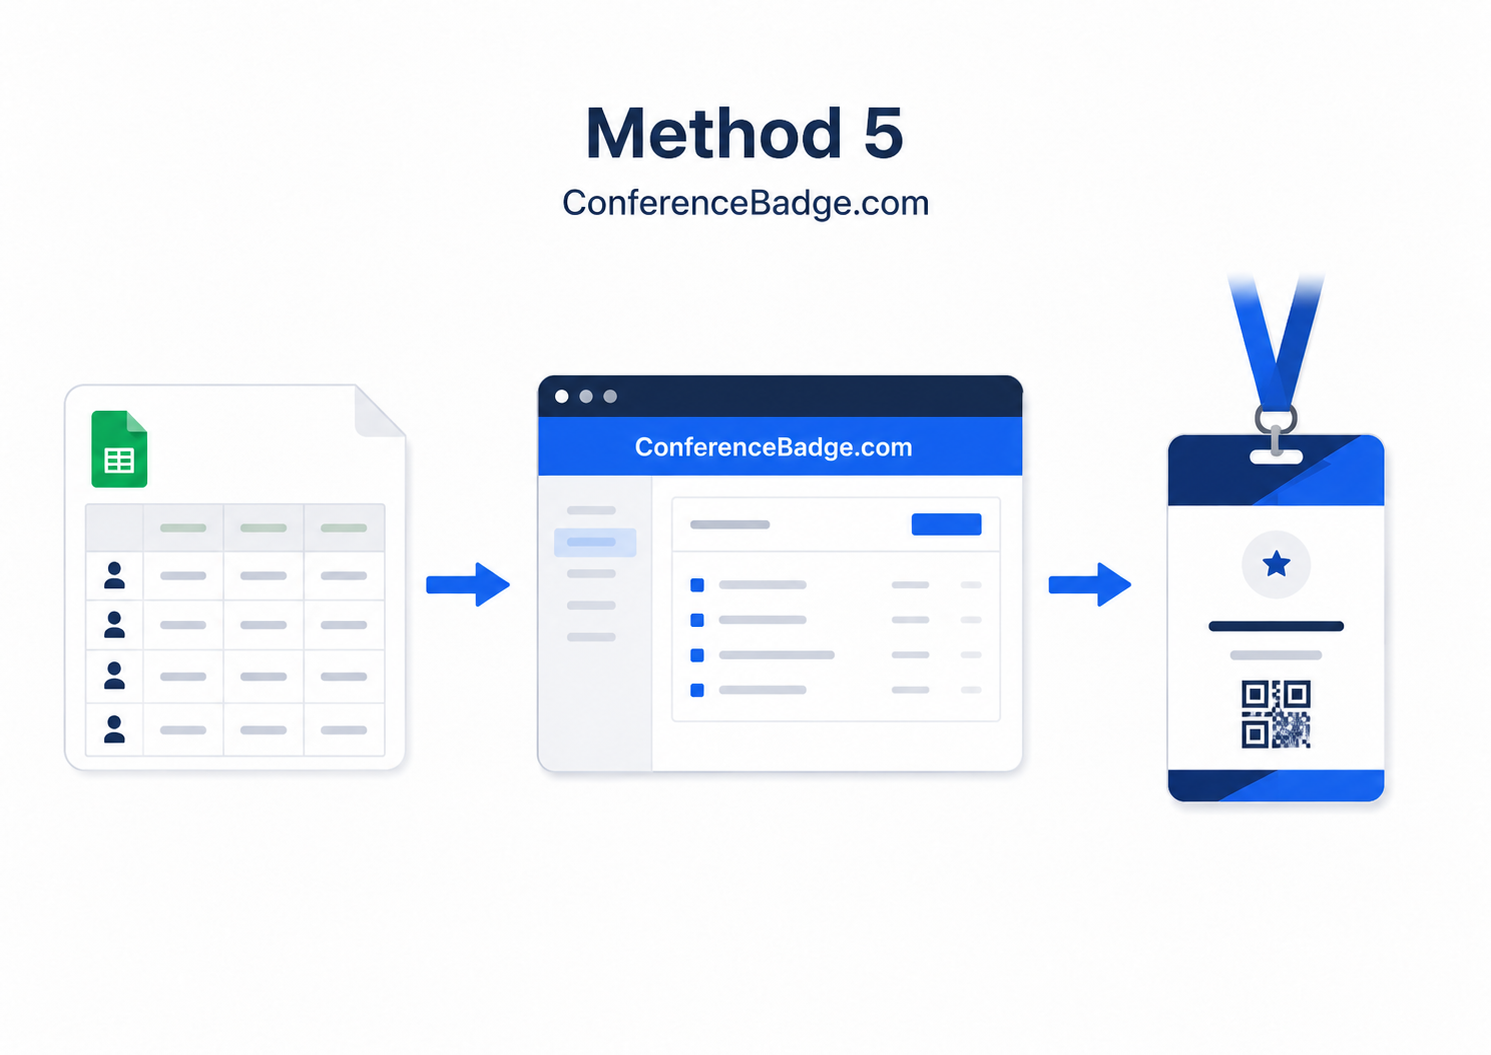
Google Sheets and ConferenceBadge.com serve two different but complementary purposes. Google Sheets gives the event team a shared place to collect, clean and update attendee information, while ConferenceBadge.com turns that information into designed, printable badges.
The most reliable approach is to treat Google Sheets as the attendee-data source rather than attempting to design the badges inside the spreadsheet. Once the list is ready, download the relevant sheet as a CSV or Excel file and upload it into ConferenceBadge.com.
Before exporting the file, make sure each attendee occupies one row and each piece of information has its own column. A typical spreadsheet may include:
First name
Last name
Company
Job title
Email
Phone
Attendee type
Registration ID
Separate columns make the badge easier to design. For example, the attendee’s first name can be displayed prominently, while the company and job title appear as smaller supporting information. An Attendee type column can also be used to distinguish speakers, sponsors, staff, exhibitors, VIPs and general attendees.
After uploading the file, match each spreadsheet column with the appropriate field in ConferenceBadge.com. Common fields such as first name, last name, company and job title may be easy to recognize, but custom fields should still be reviewed carefully before the badges are generated.
The spreadsheet can also help control which design an attendee receives. For example, a planner may create one badge design for speakers, another for VIP guests and a general design for everyone else. To make this work reliably, attendee categories should be written consistently. Values such as “VIP,” “Vip” and “V.I.P.” may be interpreted as different categories.
Google Sheets can also store the values used to create custom QR codes. If each attendee needs a unique registration link, ticket number or check-in identifier, add a column named QR code data and enter the correct value for every person. ConferenceBadge.com can then convert that field into a unique QR code on each badge.
When the attendee list changes, avoid uploading the entire spreadsheet again without reviewing the update method. If only new registrants need to be added, create a separate export containing only those attendees and append them to the existing event. Uploading the complete list as an addition may create duplicate records.
A practical workflow is:
Maintain the complete attendee list in Google Sheets.
Clean and review the final production tab.
Download that tab as a CSV or Excel file.
Upload it into ConferenceBadge.com.
Match the spreadsheet columns to the badge fields.
Create badge designs for the required attendee categories.
Preview long names, titles and company names.
Generate the PDF badges or submit the printed badge order.
Use a separate list for late registrations and walk-ins.
This workflow allows the registration team to continue collaborating in Google Sheets without relying on the spreadsheet for precise layout, QR-code placement or print alignment. Google Sheets remains the flexible source of attendee information, while ConferenceBadge.com becomes the controlled badge-design and production environment.
Choosing a ConferenceBadge.com Product
Different events need different physical formats.
PDF Badges
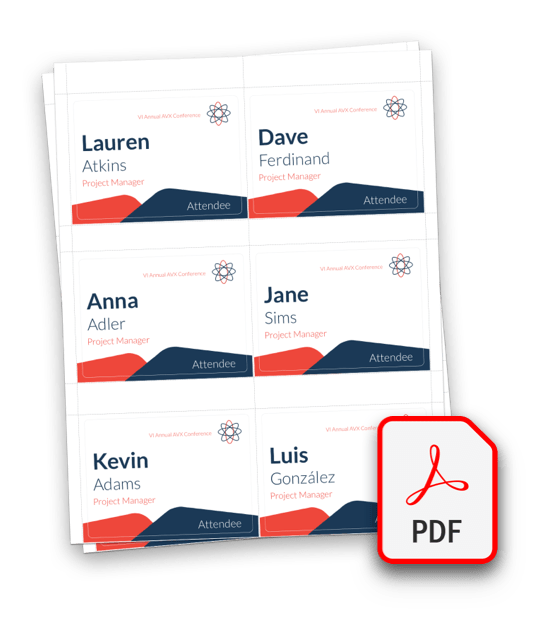
PDF badges are appropriate when the organizer wants to print locally, use Avery stock, send the file to a print shop, or retain control over reprints.
ConferenceBadge.com allows organizers to upload an attendee list and generate a populated, print-ready PDF at standard or custom dimensions. The files can be printed individually or in bulk.
This is a natural step up from a Google Docs mail merge because the organizer still handles printing but no longer needs to construct the repeating layout manually.
Cardboard Badges

Cardboard Badges work well for conferences, summits, and corporate events that want a finished credential without a separate plastic holder.
ConferenceBadge.com’s current cardboard products are printed double-sided on 16-point stock, pre-punched for lanyards, and available in common conference formats.
Check out our cardboard badges now!
These can be useful when the event team wants to convert spreadsheet data into professionally produced event badges rather than managing sheet feeding, cutting, and assembly internally.
Inserts and Holders
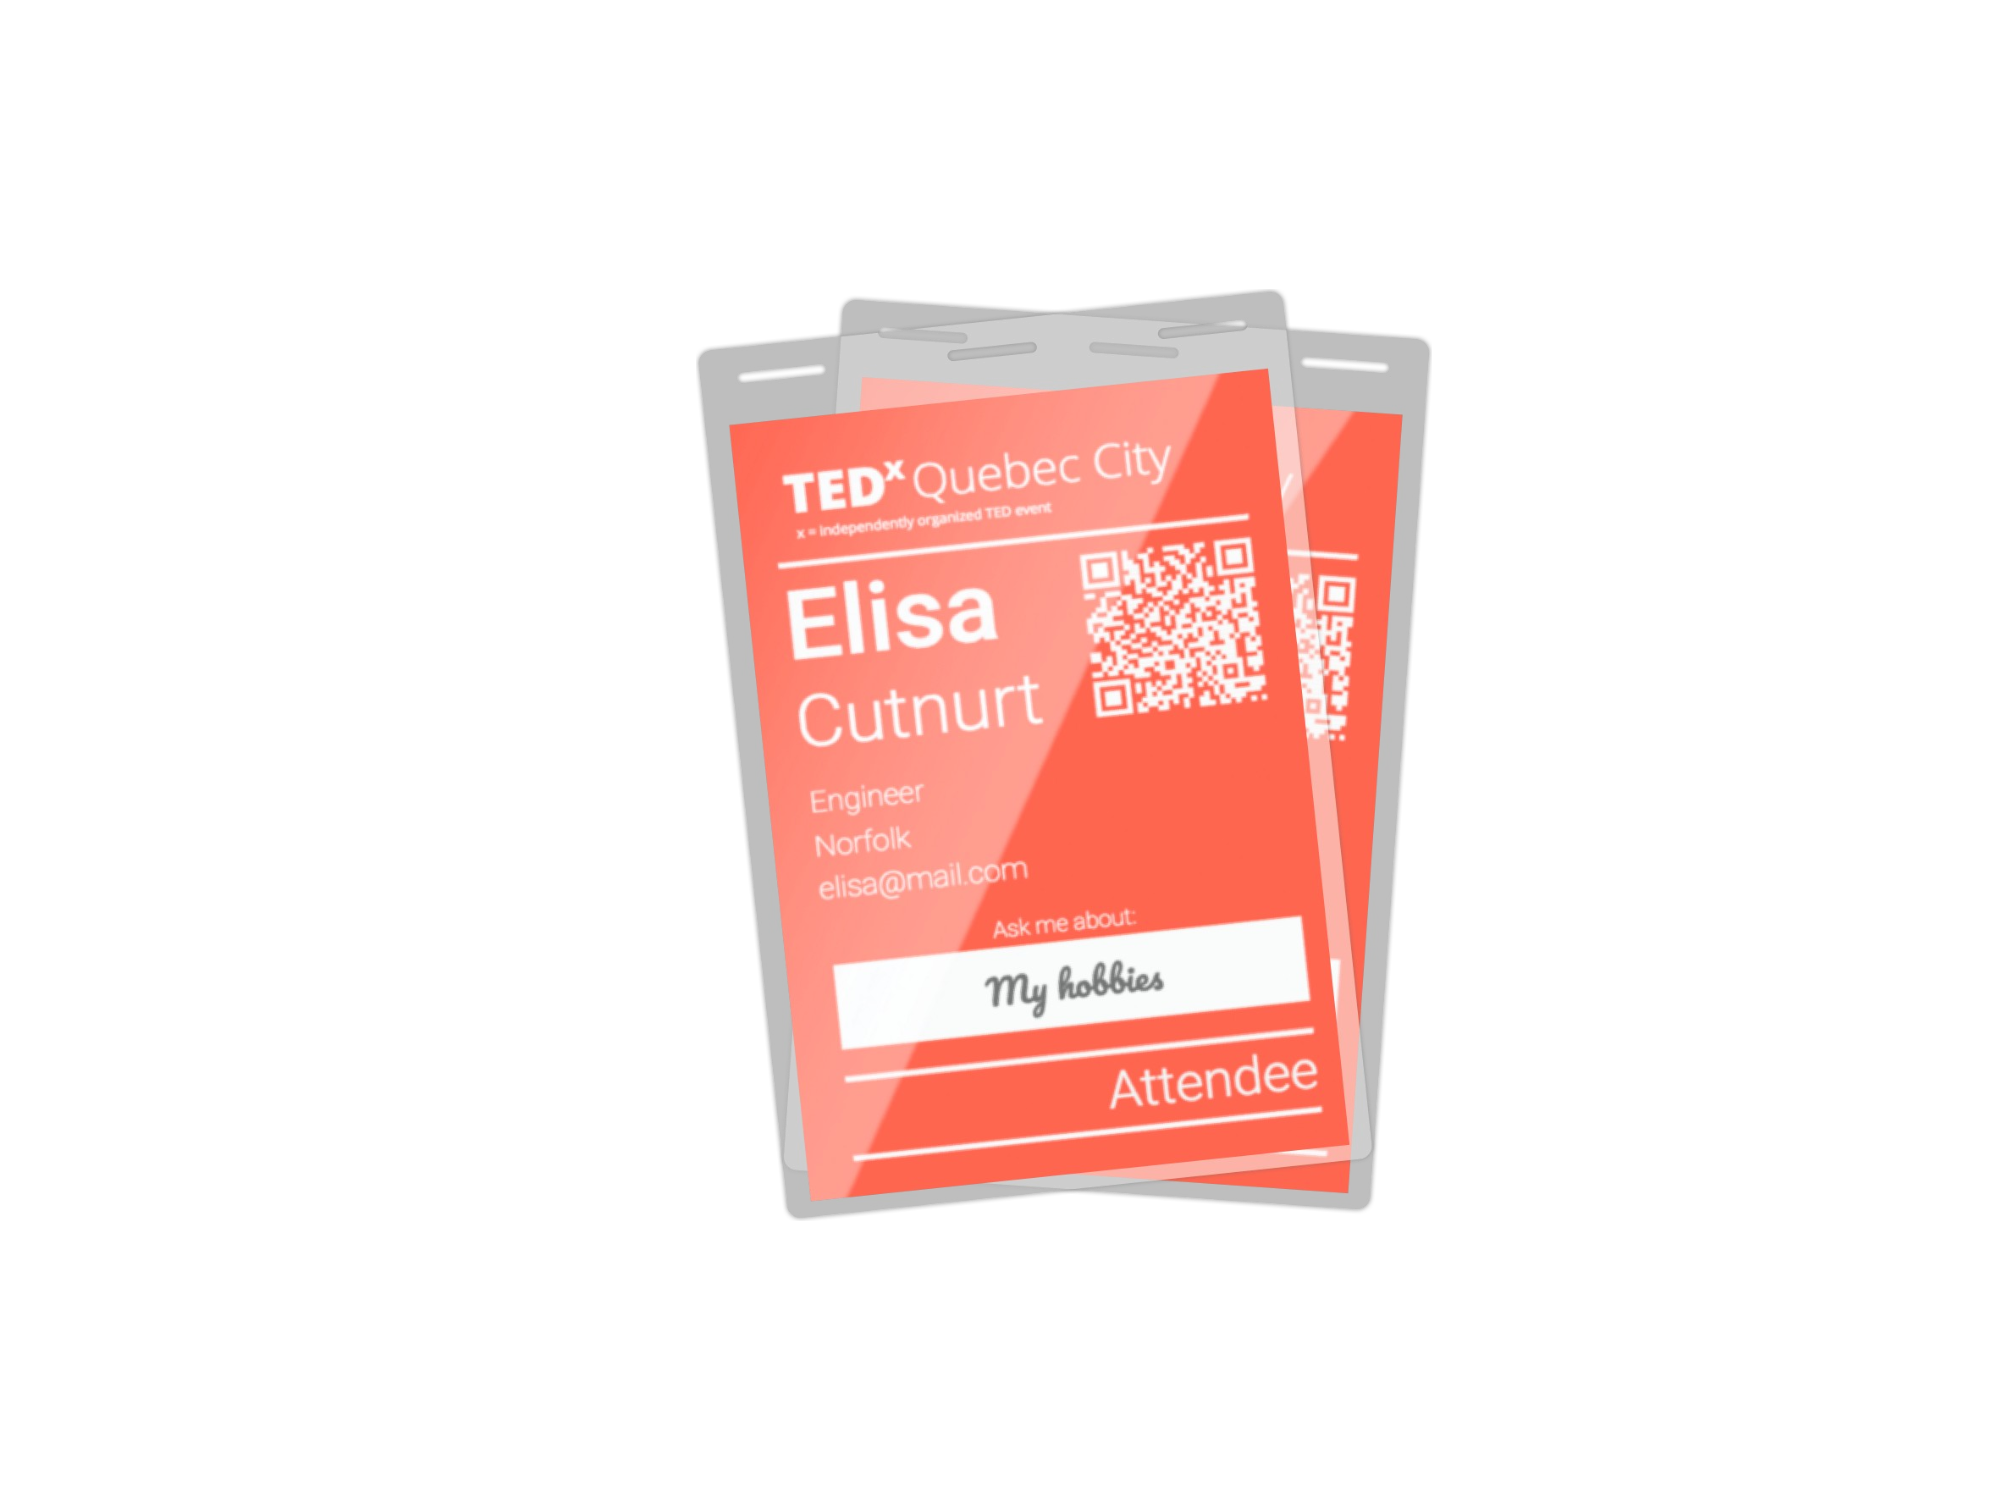
Inserts holders badges are a traditional option for multi-day events. The paper insert sits inside a protective vinyl holder, which can be useful when the badge is handled repeatedly or needs to be swapped.
ConferenceBadge.com offers printed inserts that arrive cut and preloaded into their holders.
Check out our insert holders Now!
The higher service level reduces registration-day labor. The event team does not need to spend the night before the conference cutting inserts and loading hundreds of holders.
On-Site Printing

On site printing becomes important when the attendee list changes frequently or walk-ins are expected.
ConferenceBadge.com’s browser-based Print Center produces ready-to-print PDFs and works with consumer printers, Avery products, plain stock, or its own onsite kits. The platform recommends printing at Actual Size or 100% to prevent misalignment.
https://www.conferencebadge.com/products/on-site-printing
This helps late registrants receive the same professional badge as pre-registered attendees rather than one of the event’s handwritten DIY name tags.
Can You Print Name Badges Directly From Google Sheets?
Technically, yes. A user can resize cells, create a grid, place names and logos inside the sheet, configure a print area, and print directly.
For more than a few basic badges, this is rarely the most reliable approach.
Google Sheets is designed around cells and data analysis rather than fixed print layouts. Page breaks, scaling, image placement, row heights, and margins can become difficult to control. A badge grid that looks aligned inside the browser may shift when exported or sent to a different printer.
Direct printing may be reasonable when:
Only a handful of badges are required
The badges will be cut manually
The design contains only a name
Plain card stock is being used
Exact alignment with perforated stock is not required
For most events, it is better to use Google Sheets as the data source and generate the printable design through Docs, Labelmaker, Avery Design & Print, or event badge software.
How to Add Logos to Name Badges From Google Sheets
The event logo should normally be added to the badge template, not stored inside the spreadsheet.
The spreadsheet manages variable data. The template manages consistent visual elements.
Add the logo in:
Google Docs
The label add-on editor
Avery Design & Print
ConferenceBadge.com
Another badge design platform
Use a high-resolution image or vector file when the system supports it. A small logo copied from a website may look acceptable on a monitor but print with visible pixelation.
Logo placement should remain consistent across every badge. Keep it away from:
Trim edges
Lanyard holes
Holder seams
QR codes
The attendee’s name
The logo should support the event identity rather than compete with the person wearing the badge.
A common design mistake is to make the event brand the largest element. From a networking perspective, the attendee name usually deserves more visual weight.
Font and Readability Decisions
The awkward keyword phrase Font event name tag reflects a real design question: which font and type size should be used on an event name tag?
A clean sans serif typeface usually works because it remains readable across varying names and viewing distances. The first name should be one of the largest elements on the badge, especially when networking is important.
Do not judge font size while zoomed into the design. Print a sample and place it on a lanyard. Step several feet away and assess whether the name can be read naturally.
The available space depends on:
Event badge sizes
Portrait or landscape orientation
Company and title length
Logo size
QR code placement
Attendee category labels
Badge holder seams
How to Add QR Codes or Barcodes to Badges From Google Sheets
Google Sheets can store the data used to create a QR code, but ordinary spreadsheet text does not automatically become a scannable image.
The sheet might contain:
Its documentation also recommends a code size of approximately 1.2" × 1.2" in one compatible workflow.
QR Code Best Practices
When producing QR codes for events:
Use a unique value for each attendee.
Maintain high contrast.
Leave clear space around the code.
Do not stretch or distort the image.
Keep it away from a lanyard hole or clip.
Test it through the finished badge holder.
Test it using the actual check-in device.
Avoid reflective placement where glare may interfere.
Do not make the code unnecessarily dense.
Avoid encoding personal information directly when a secure registration ID or check-in URL can be used instead.
ConferenceBadge.com notes that denser QR codes can become harder for smartphones and scanners to read, which is one reason its vCard codes limit the amount of included contact data.
https://help.conferencebadge.com/29255-lead-retrieval/224381-what-info-is-included-in-the-qr-code
Print Settings for Google Sheets Name Badges
Many badge projects fail at the final print stage rather than during the data merge.
The safest approach is to export the completed badge document as a PDF before printing. A PDF preserves the page dimensions and layout more reliably than an editable Google Doc.
Use these settings as a starting point:
Actual Size or 100%
No scaling
Correct page size
Correct portrait or landscape orientation
Correct printer tray
Appropriate paper or stock setting
Single-sided or double-sided printing as required
High-quality output for logos and QR codes
Avoid Fit to Page unless the template provider specifically requires it. Fit settings can shrink or reposition the badge grid, creating misaligned labels.
Always Print on Plain Paper First
Print one page on standard paper and hold it against the unused badge sheet.
Check whether:
The first badge is positioned correctly
Lower rows remain aligned
Names stay inside the cut lines
Margins match the stock
Logos remain sharp
QR codes scan
The orientation is correct
No content falls beneath a hole or clip
A plain-paper test costs very little and can prevent an entire package of expensive badge stock from being wasted.
A Mini-Case: The Design Was Correct, but the Printer Was Not
A conference team generated 500 aligned labels from its spreadsheet and reviewed the PDF carefully. Everything appeared correct.
The office printer automatically applied a Fit setting. The first row was only slightly displaced, but the error became larger farther down each page. Names on the bottom row crossed the perforations.
The planner initially assumed the label template was wrong. After comparing the PDF dimensions with the physical stock, the team discovered the print scaling. Changing the setting to Actual Size corrected the entire sheet.
The lesson was simple: screen review confirms the design, while the test print confirms the production system.
Troubleshooting Common Problems When Printing Badges From Google Sheets
The Badges Are Not Aligned
First, confirm that the label design matches the exact stock or product number.
Then check:
Page size
Portrait or landscape orientation
Printer margins
Template dimensions
Row and column spacing
Actual Size or 100% scaling
Printer feed settings
If the first badge aligns but later rows drift, the vertical spacing or pitch may be wrong.
Do not manually reposition every attendee name. Correct the underlying template so the fix applies to the entire set.
The Merge Fields Are Blank
Blank merge fields are usually caused by a mismatch between the template placeholders and the spreadsheet headers.
Confirm that:
The first spreadsheet row contains the headers
The add-on is connected to the correct tab
There are no blank rows above the headers
The placeholder spelling matches the column name
The tool has permission to read the file
The data range includes all attendee rows
If the sheet says “First Name” and the label template says {{FirstName}}, the system may not recognize the connection.
Every Badge Looks the Same
The merge may be using one row repeatedly instead of treating each row as a separate record.
Review the add-on’s record settings and confirm that the template is configured to advance through the spreadsheet data.
Regenerate the document and preview several pages before printing.
Long Names Do Not Fit
Find the longest names before finalizing the design.
Possible solutions include:
Reduce the font size slightly
Allow controlled text wrapping
Separate first and last names
Make the first name larger than the surname
Shorten optional titles
Reduce the size of secondary branding
Choose a larger badge
Do not shrink every name to solve one exceptional record unless the result remains readable for the rest of the event.
QR Codes Do Not Scan
Increase the code size and confirm that it has a high-contrast background.
Do not stretch the image. Preserve a clear border around it and test it on the final material. A code may scan from a computer screen but fail when reduced, laminated, or placed behind a glossy holder.
The Logo Is Blurry
Replace the image with a higher-resolution or vector version. Do not enlarge a small web thumbnail.
The logo should be added to the badge template rather than repeatedly inserted into the spreadsheet.
The PDF Does Not Match the Google Doc
Export the document again and check whether fonts, images, or page breaks changed.
Some Google Docs layouts are sensitive to content length. A purpose-built label add-on or badge platform may produce more consistent fixed-dimension output.
The Wrong Attendees Are Included
Check that the correct sheet tab and row range were selected.
Remove cancellations and test records before generating the final file. When the workbook contains multiple exports, use a clear name and date for the production tab.
Best Practices for Printing Name Badges From Google Sheets
A successful badge workflow protects both the attendee data and the physical output.
The strongest practices are:
Clean the sheet before merging.
Use simple, unique column names.
Keep one attendee per row.
Separate fields that need different formatting.
Confirm the badge size before designing.
Use a template that matches the stock.
Make attendee names large and readable.
Use event categories consistently.
Keep logos high resolution.
Export the final badges to PDF.
Print a test sheet before using the real stock.
Save the final PDF for reprints.
Limit unnecessary personal information.
Establish an onsite correction process.
The process should also reflect how the registration desk will operate.
If the badges will be filed alphabetically, sort them by surname before printing. If check-in is divided by company, department, or attendee category, organize the badge output the same way.
The printing order is part of the attendee journey. A technically perfect badge is less helpful if staff cannot find it while a line grows at registration.
Planning for Walk-Ins and Last-Minute Changes
A finished badge batch does not eliminate the need for a live-event plan.
Attendees may:
Register late
Change their company
Request a preferred name
Replace a lost badge
Arrive as a substitute
Discover a spelling error
Need a different access category
For a small event, the team may keep a Google Sheets walk-in tab and generate a few additional printable name tags through its existing merge tool.
For larger events, a dedicated onsite workflow is usually more efficient. It allows staff to find one person, update the record, and print one badge without regenerating the complete file.
This is one of the points where ConferenceBadge.com can convert a spreadsheet-based process into a more complete event operation. The team can preprint the main set as Cardboard Badges or inserts and holders, then use on-site printing for exceptions.
The result is a consistent attendee experience. A walk-in receives the same branded credential as someone who registered months earlier rather than an apologetic handwritten sticker.
Badge Integrations and the Registration Ecosystem

Google Sheets may be the official attendee list, but it is often only one part of the event technology stack.
Badge integrations may connect registration tools, ticketing platforms, lead retrieval services, check-in apps, and badge printing systems.
The planner should determine:
Which platform owns the attendee record
How often data is updated
Whether changes sync automatically
Whether a new CSV must be exported
How QR codes are generated
How reprints are tracked
Whether codes support one event or multiple sessions
What happens when the internet connection fails
Not every event needs advanced integrations. A 75-person corporate retreat may be better served by one clean Google Sheet and a verified PDF.
A 5,000-person trade show may require a more integrated system because the cost of disconnected data is much higher.
The appropriate technology should follow the event use cases rather than the desire to add more software.
Conference Badge Alternatives
Traditional conference badges are not the only option.
Conference badge alternatives include:
Adhesive labels
Reusable magnetic name tags
Printed table cards
Wristbands
Digital credentials
Employee ID cards
Handwritten DIY name tags
Mobile check-in profiles
Each option solves a different problem.
Adhesive labels can work for a short, informal meeting. Wristbands can communicate access categories at a festival. Magnetic badges may suit employees who attend recurring sessions.
These formats become less effective when networking, company identification, sponsor visibility, QR scanning, or detailed access control is important.
A traditional lanyard badge remains popular because it can combine identity, event branding, scanning, category information, and operational details in one visible object.
Using Event Feedback to Improve the Next Badge Run

Badge performance can be evaluated after the event.
Relevant post event survey questions may include:
Was your badge comfortable to wear?
Was the printed name easy to read?
Did the badge provide the information you needed?
Did QR code scanning work reliably?
Was your attendee category clear?
Did the badge holder or lanyard function properly?
Registration staff should also be asked:
How quickly could badges be found?
Which errors required reprints?
Did the printing workflow support walk-ins?
Were any badge categories confusing?
Did long names or job titles create recurring issues?
These findings can improve the spreadsheet structure, template, sorting approach, materials, and print workflow for the next event.
Name Badge Printing Checklist
Before printing, confirm:
The Google Sheets data has been proofread.
Each row represents one attendee.
Column headers are simple and unique.
The correct sheet tab has been selected.
Canceled and duplicate registrations have been removed.
Badge dimensions are confirmed.
Badge stock and holder sizes are confirmed.
The label template matches the physical format.
The logo is high resolution.
Merge fields are mapped correctly.
Attendee categories appear correctly.
Long names have been previewed.
QR codes or barcodes have been tested.
The final set has been exported to PDF.
Printer scaling is set to Actual Size or 100%.
A plain-paper test sheet has been printed.
The complete badge set has been reviewed.
A reprint and walk-in process is ready.
The final PDF has been saved as a backup.
Frequently Asked Questions
How do I convert Google Sheets to Avery labels?
Open Avery Design & Print, select the correct Avery product number, choose Import Data or Mail Merge, and connect Google Drive. Select the Google Sheet, map its columns to the Avery label design, preview the results, and print a test page before printing the final sheets.
Is there a way to print labels from Google Sheets?
Yes. You can use a Google Workspace label add-on, Avery Design & Print, Google Docs with a merge tool, or dedicated badge software. Google Sheets stores the data, while the other tool creates the fixed printable layout.
How do you make name badges in Google Docs?
Create a table or badge template in Google Docs, add placeholders that match the Google Sheets headers, and use a mail merge add-on or Apps Script to replace the placeholders with attendee data. Export the generated document as a PDF and print it at actual size.
How do you print name badges from Excel?
Use the Excel file as a mail merge data source in Microsoft Word, import it into Avery Design & Print, or upload it into badge software such as ConferenceBadge.com. Map the columns to the badge fields, preview the output, print a test page, and then produce the full set.
How do you print mailing labels from Google Sheets?
Choose a mailing-label template in a Google Workspace add-on or Avery Design & Print, connect the Google Sheet, map fields such as name and address, generate the labels, and print the final PDF at 100% scale.
Will the Word template that Avery provides work in Docs?
It may open in Google Docs, but precise table dimensions, margins, fonts, and page spacing can change during conversion. For reliable alignment, use Avery Design & Print, a Google-compatible Avery template, or a label tool that supports the exact product number.
Can I use an Excel file directly?
Yes. Many badge platforms and Avery tools accept xlsx or CSV files directly. A Google Sheet can be downloaded as an Excel file or CSV and then imported into the selected badge system.
How can I print name badges using data from Google Sheets?
Clean the spreadsheet, choose the physical badge size, connect the sheet to a Google Docs merge add-on, Avery tool, or event badge platform, map the spreadsheet fields, generate the badge set, export it as a PDF, and test the alignment before printing.
What is the process to print name badges from Google Sheets?
The process consists of preparing the attendee data, confirming the badge stock, selecting a compatible template, connecting or importing the sheet, mapping the fields, generating the badges, reviewing the output, printing a test page, and producing the full batch.
How can I create and print name badges using Google Sheets?
Use Google Sheets as the shared attendee database, then connect it to a fixed badge layout. The layout may be created through Google Docs, Labelmaker, Avery Design & Print, Autocrat, or dedicated event badge printing software. Generate a PDF and print at actual size.
Can Google Sheets create name badges?
Google Sheets can store and organize the badge information, but it is usually not the best tool for the final design. A template or badge platform provides better control over dimensions, margins, logos, merge fields, and print alignment.
Can I mail merge name badges from Google Sheets?
Yes. Google Sheets can supply the records for a mail merge add-on, an Apps Script workflow, or a Google Docs document-generation tool. Each spreadsheet row becomes a separate name badge.
Can I print Avery badges from Google Sheets?
Yes. Avery Design & Print can import Google Sheets data through Google Drive. You can also use a compatible Google Workspace label add-on, provided the selected template matches the Avery product number.
Why are my badges not printing in the right place?
The most common causes are an incorrect template, the wrong paper size, printer scaling, incorrect orientation, margin differences, or a mismatch between the template and badge stock. Print a plain-paper test at 100% and compare it with the unused sheet.
Can I add QR codes to badges from Google Sheets?
Yes. Store a unique ID, URL, or custom value in the spreadsheet and use a tool that converts the value into a QR code. Keep the code high contrast, preserve clear space around it, and test the final printed version before producing the complete badge set.
